Administration and User Management
Virgo makes it easy for a user with the Administrator or User Manager role to specify an organization's jurisdictions, manage users and passwords, and track user activity through a security log.
 This Help topic includes the following sections:
You will learn how to access your industry and jurisdiction coverage, manage different features within the user management system, and review login activity captured by the security log.
Length: 3 minutes.
Company Information, Industries, and Jurisdictions are grouped under the Admin tab.
All company information is listed under the Company tab. Virgo records your basic company information including Industries and Jurisdictions that are relevant to your business. For example, you can specify your organization's jurisdictions that will display to users on the Citations by Jurisdiction section of the Dashboard.
TIP: Click Edit to review your Industries and Jurisdictions.
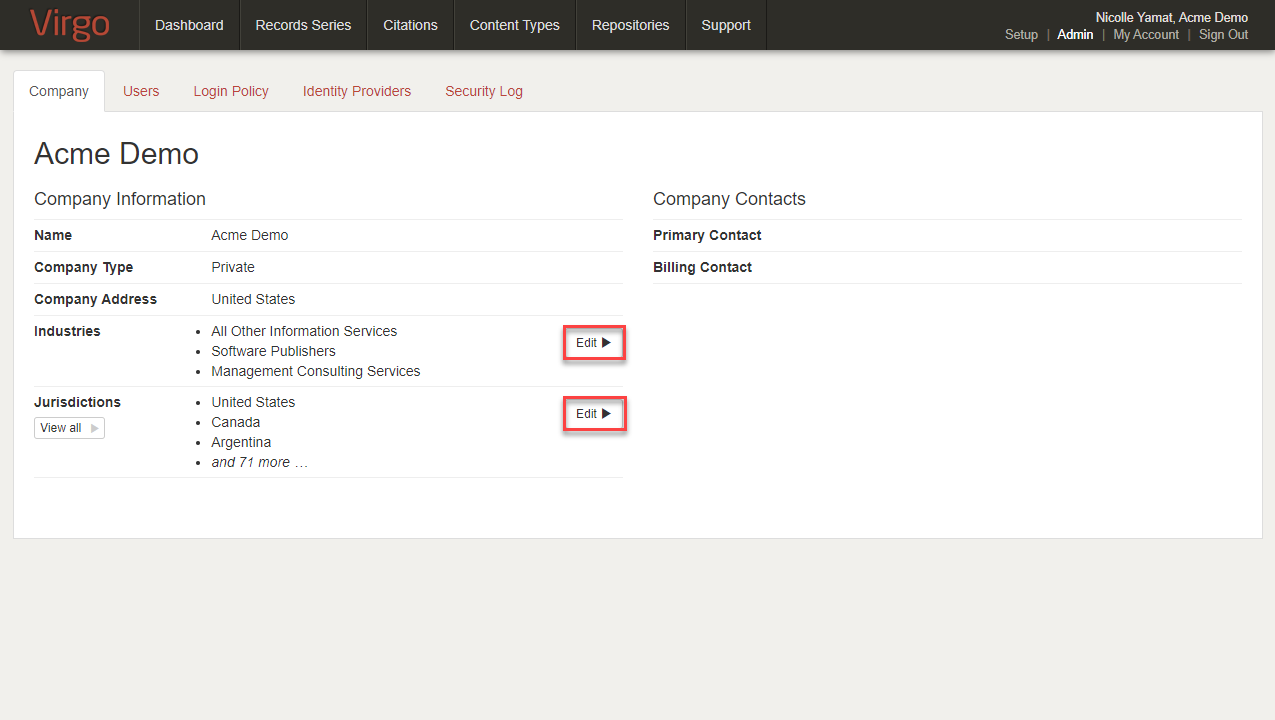 To view an example of the Company tab, hover your mouse over the image.
Virgo makes it simple to update Industries and Jurisdictions.
-
Select the Industry Groups applicable to your business.
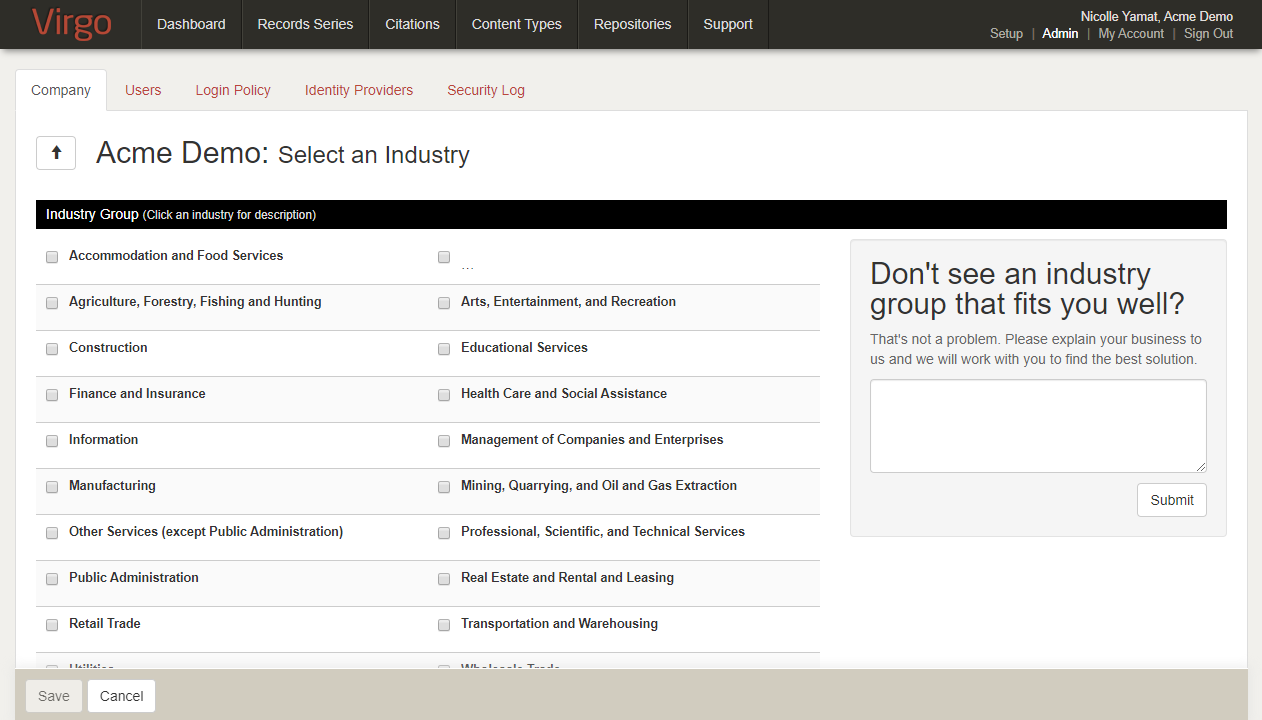 To view an example of Industry Groups, hover your mouse over the image.
-
Click View as map to review where your citations are covered.
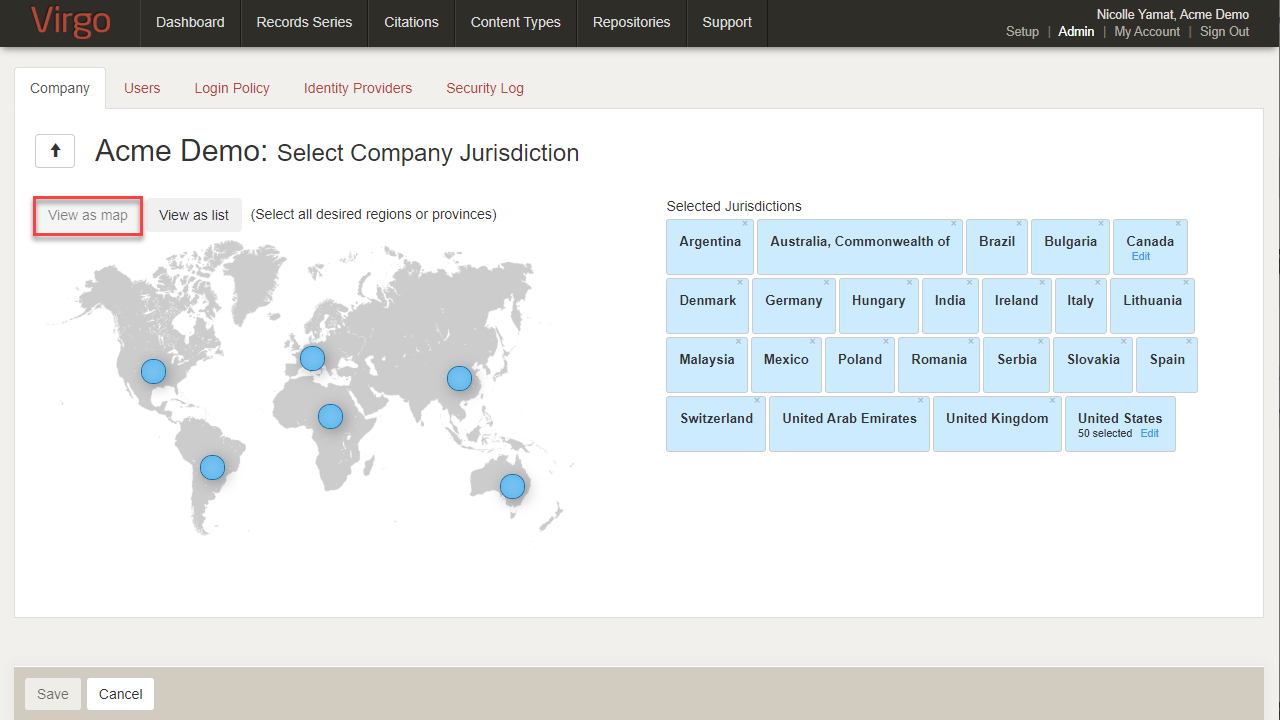 To view a map of Jurisdictions, hover your mouse over the image.
- Click View as list to review where your citations are covered.
- Select the countries, states or provinces you would like to add (sorted in alphabetical order by country).
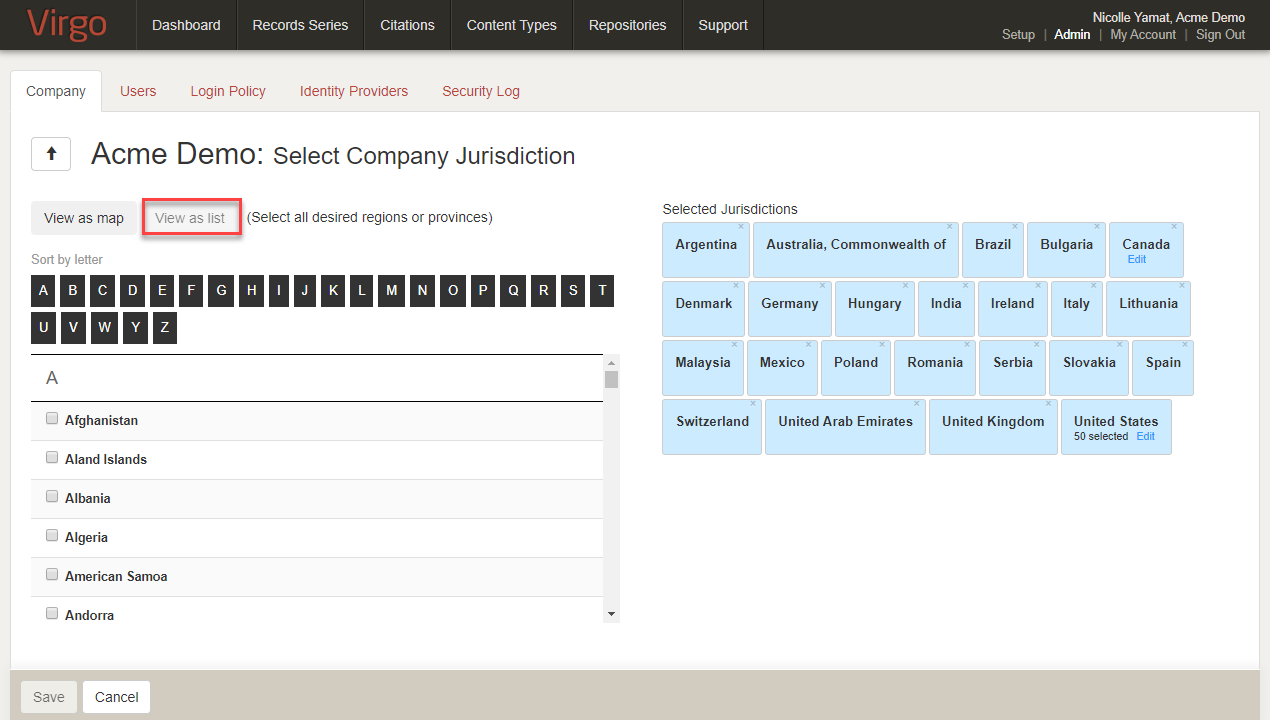 To view a list of Jurisdictions, hover your mouse over the image.
The Users tab displays the Virgo users in your organization. You can manage Virgo users, their roles, passwords, and other settings and information.
- Click the Admin link.
- Click the Users tab.
- View user details by selecting the appropriate user from the list and then double-clicking or click the View Detail button at the bottom of the screen.
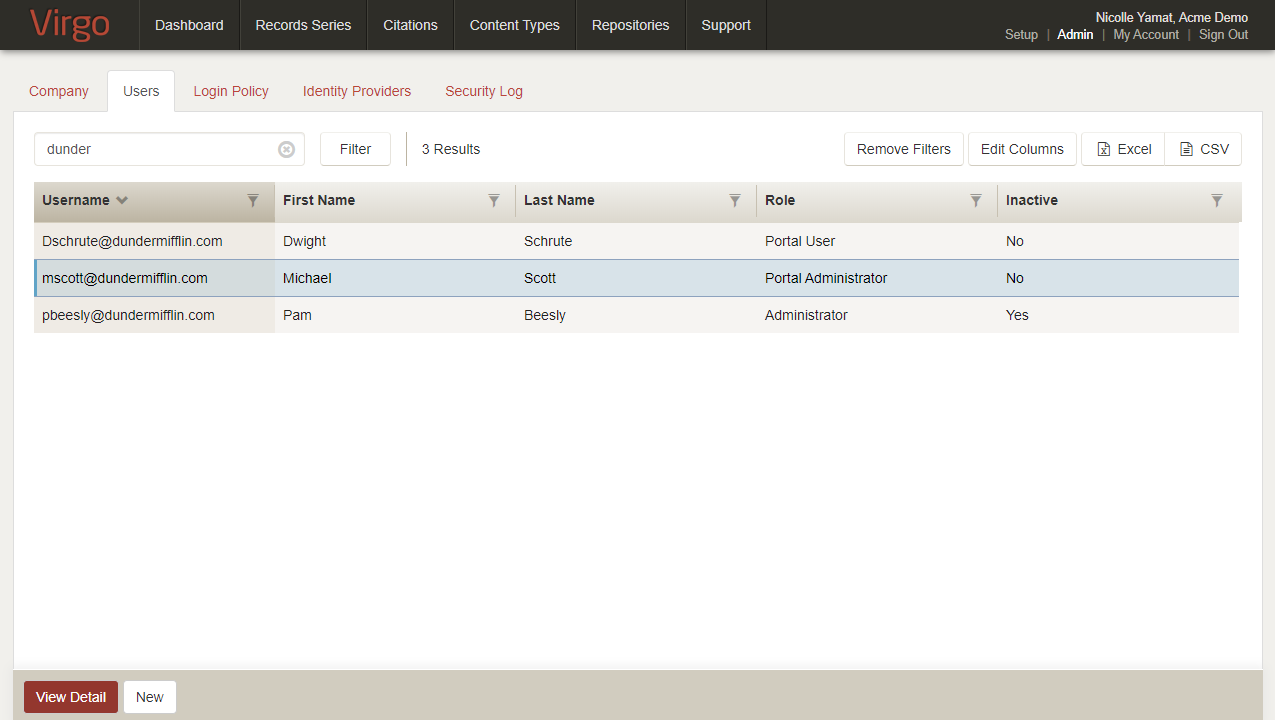 To view an example of the Users tab, hover your mouse over the image.
- Click on any field in the user screen to edit the value of the field.
- To set a new password for the user, click on the masked Password field. In Current Password, enter your password (not the user's). Enter the user's New Password and then enter the password again in Confirm New Password. Click Save.
- Select a user Role. Roles control access to various features.
- If your Virgo subscription includes the Security Groups feature, specify a user Security Group.
- Federation ID can be used with Single Sign On if your user identifier is different than your user name or email address.
- Users cannot be deleted, but they can be marked Inactive, which removes all access to the system.
- In the Email field, specify an email address that is different from the user name. This is useful if the user name is generic, as may be the case with a service account, but password reset emails and other system notifications should go to a monitored email address. In Current Password, enter your password (not the users).
- In Export Encoding specify the character encoding for .CSV export reports.
- In Export Delimiter specify the delimiter type for .CSV export reports.
- In Export Timezone specify the timezone for .CSV export reports.
- Once you have changed a field, click Save or Cancel to the right of the field.
- Click Reset Password to trigger a reset email to the user. The email will be sent to the address in the Email field, not the User Name field.
- Add a user by navigating to the Users tab and clicking New at the bottom of the screen.
TIP: All users, active and inactive, are listed on the Users tab.
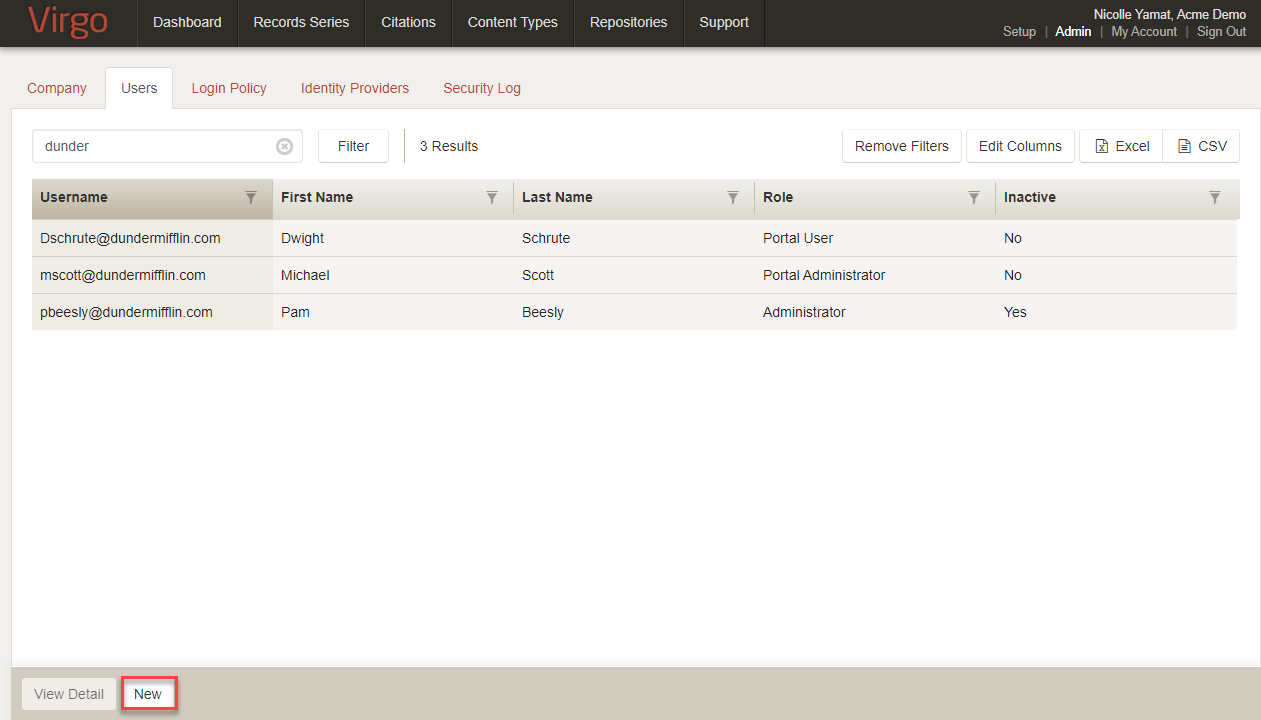 To view an example of how to create a new user, hover your mouse over the image.
NOTE: The New User screen requires that you enter the user’s First Name, Last Name, User Name, Role, and Password.
- User Name must be in the form of an email address. Once you create the new user, you may optionally enter a different email address for system notification purposes.
- In the Generate Password field, select Yes if you would like Virgo to automatically generate a password.
- Select a user Role. Roles control access to various features.
- If your Virgo subscription includes the Security Groups feature, specify a user Security Group.
- Federation ID can be used with Single Sign On if the user identifier is different than the user name or email address.
- OPTIONAL: Enter the Contact Information fields.
- In Export Encoding specify the character encoding for .CSV export reports.
- In Export Delimiter specify the delimiter type for .CSV export reports.
- In Export Timezone specify the timezone for .CSV export reports.
- When finished, click the Save button.
Once the user has been created, you may either distribute the password to your new user or you can require your user to create a new password by triggering a password reset.
Virgo uses role-based security to control access to various features. A user's role determines their access to features in Virgo. For example, a user with read access cannot change information. But a user with the Records Manager role has full control of Record Series and Content Types.
The table below describes each role and level of access to various Virgo features.
| Role Name | Description | Record Series Tab | Citations Tab | Content Types Tab | Repositories Tab | Private Comments |
Setup Tab | Admin Tab | Employee Portal Configuration |
| Administrator | Virgo admin with full control of all tabs. Full control of Admin subtabs including those related to user management. Access to Employee Portal Admin View and the Configure button for views. Also has read-only access to the Record Schedule and Content Types views in the Portal. | Full Control | Full Control | Full Control | Full Control | Create | Full Control of all subtabs | Full Control of all subtabs | Full Control |
| API Service Account | Virgo API service account with read-only access to all tabs except the Admin tab. | Read | Read | Read | Read | None | Read | None | None |
| Collaborator | Virgo user with read-only access but can add private comments. | Read | Read | Read | Read | Create | Read | None | None |
| Content Manager | Virgo user with full control of Content Types and Repositories tabs. Also has full control of some Setup subtabs related to content management. | Read | Read | Full Control | Full Control | Read | Full Control of Departments, Owners, and Processes subtabs | None | None |
| IG Manager | Information Governance manager with full control of all tabs except the Citations tab and the Admin tab. Also has full control of some Setup subtabs related to IG. | Full Control | Read | Full Control | Full Control | Create | Full Control of Departments, Owners, Processes, Criticality, Privacy, Security, and Volume subtabs | None | None |
| Legal Reviewer | Virgo user with read-only access to all tabs and full control of the Citations tab. | Read | Full Control | Read | Read | Create | Read | None | None |
| Portal Administrator | Virgo Employee Portal admin with access to Admin View and the Configure button for views. Also has read-only access to the Record Schedule and Content Types views in the Portal. | None | None | None | None | None | None | None | Full Control |
| Portal User | Virgo Employee Portal user with read-only access to the Record Schedule and Content Types views in the Portal. | None | None | None | None | None | None | None | None |
| Portal User Plus | Virgo Employee Portal user with read-only access to the Record Schedule and Content Types views in the Portal. Also has read-only access to Record Series and Repositories fields (if enabled) for Content Types views. | None | None | None | None | None | None | None | None |
| Read Only | Virgo user with read-only access to all tabs except the Admin tab. | Read | Read | Read | Read | None | Read | None | None |
| Records Manager | Virgo user with full control of the Record Series, Citations, and Content Types tabs. Also has full control of some Setup subtabs related to records management. | Full Control | Full Control | Full Control | Read | Create | Full Control of Functions, Entities, Departments, Owners, and Trigger Events subtabs | None | None |
| Records Manager Assistant | Virgo user with full control of the Record Series, Citations, and Content Types tabs | Full Control | Full Control | Full Control | Read | Create | Read | None | None |
| User Manager | Virgo user with full control of some Admin subtabs related to user management. No access to information in Virgo. | None | None | None | None | None | None | Full Control of Company, Users, Login Policy, Identity Providers, Security Log, and Security Groups subtabs | None |
Virgo supports dedicated API service accounts. API service accounts let applications securely access Virgo APIs.
For example, an organization creates their own application that automatically requests data using Virgo APIs. An administrator creates an API service user account with the API Service Account role that provides minimal, read-only access to Virgo data. The application requests and receives data via the dedicated API service user account.
NOTE: An API service user account is typically not for a person and is intended for an API service.
-
On the Users page, click New.
-
Enter the First Name (for example, API), Last Name (for example, Service Account), Username, and Password (or generate).
-
In Role, select API Service Account.
The API Service Account role provides read-only access to data on these tabs: Record Series, Citations, Content Types, Repositories, and Setup. The API Service Account role cannot edit any data in Virgo and has no access to Private Comments or information on the Administration tab.
-
Leave the Security Groups field blank.
-
Leave the Federation ID field blank.
-
In Inactive, select No.
-
OPTIONAL: Update any Contact Information and specify Regional Settings or leave the default information.
-
Click Save.
-
On the Login Policy page, for the Allow API Service Users to Login Without SSO option select Yes.
Virgo records this event in the Security Log. Virgo also records any events by the API service account in the Security Log.
-
On the Users page, select the user, and then click View Detail.
-
In Role, select API Service Account.
The API Service Account role provides read-only access to data on these tabs: Record Series, Citations, Content Types, Repositories, and Setup. The API Service Account role cannot edit any data in Virgo and has no access to Private Comments or information on the Administration tab.
-
Click Save.
-
On the Login Policy page, for the Allow API Service Users to Login Without SSO option select Yes.
Virgo records this event in the Security Log. Virgo also records any events by the API service account in the Security Log.
This section includes the following subsections:
Complex passwords are required. Passwords must include:
- 10 to 50 characters
- At least one uppercase letter
- At least one lowercase letter
- At least one number
- At least one special character from this list: ! @ # $ % ^ & * ( ) - _ = + [ ] { } | \ : ; " ' < > , . ? / ~ `
Administrators and User Managers can trigger a password reset for a user or a user can request a reset using the Forgot my password feature.
To specify a new password for a user
- Click the Admin link.
- Click the Users tab.
- View user details by selecting the appropriate user from the list and then double-clicking or click the View Detail button at the bottom of the screen.
- Click in the masked Password field.
- In Current Password, enter your password (not the user's).
- Enter the user's New Password and then enter the password again in Confirm New Password.
- Click Save.
To trigger a password reset for a user
- Click the Admin link.
- Click the Users tab.
- View user details by selecting the appropriate user from the list and then double-clicking or click the View Detail button at the bottom of the screen.
- Click the Reset Password button and click Yes.
- Virgo will send a password reset email to the user.
User accounts are locked out after 10 failed login attempts. The user will be unlocked automatically after 15 minutes of inactivity, or an administrator can unlock the user at any time.
Both lockout parameters can be configured or disabled.
- Select the user and view details.
- Click the Unlock User button.
Administrators can't delete a user's account but they can deactivate a user's account. This preserves the Audit Trail within Virgo.
- View the user record.
- Click on the value of the Inactive field to edit.
- Set the value of Inactive to Yes.
- Click Save. The user no longer has access to Virgo.
You can manage user login policies, including the minimum password length. The table below describes the fields on the Login Policy tab.
| Field | Description |
|---|---|
|
Session Inactivity Timeout (minutes) |
The number of minutes Virgo can be inactive before a session will time out. |
|
Minimum Password Length |
The minimum length of a Virgo password, which must be at least 10 characters. |
|
Failed Login Attempts Before User Lockout |
The number of times a user can try to log into Virgo before they are locked out. |
|
User Lockout Reset Waiting Period (minutes) |
The number of minutes before a locked out user can try to log back into Virgo. |
|
Authentication Domain Name |
A unique string to identify your Virgo instance for the purpose of providing SSO login options. This value is used in the Login URL field. |
|
Login URL |
The URL to the Virgo login screen. Click the paperclip to open the Virgo login screen. |
|
Disable Standard Login (Require SSO) |
By default, users are permitted to use the standard login or SSO. Select No Users to let users log into Virgo with their user names and passwords and bypass SSO. To prevent the use of standard login, set this value to either Non-administrators or All users. If you opt for All users, please be certain that your SSO configuration is working correctly before enabling this restriction. |
| Allow API Service Users to Login Without SSO |
If set to Yes and the Disable Standard Login (require SSO) field is set to Non-administrators or All users, a dedicated API service account (with the API Service Account role) can simply log into Virgo via a user name and password and bypass SSO. If set to No and the Disable Standard Login (require SSO) field is set to Non-administrators or All users, a dedicated API service account (with the API Service Account role) has to log into Virgo via SSO. |
|
Allow URL Token Login |
If set to Yes, an Employee Portal User or Employee Portal User+ can log into the Virgo Employee Portal via a token. |
|
SharePoint Tenant Id(s) |
This field supports the Virgo Employee Portal SSO for SharePoint feature. Enter the Microsoft 365 Tenant ID. To enter multiple Microsoft Tenant IDs, separate the IDs with commas. |
|
Virgo Identifier Field |
This optional field supports the Virgo Employee Portal SSO for SharePoint feature. To log Virgo users into the Virgo Employee Portal, enter the Virgo user information to match in Microsoft 365. For example, Username. |
|
Employee Portal User Mapping |
This optional field supports the Virgo Employee Portal SSO for SharePoint feature. To allow non-Virgo users to access the Virgo Employee Portal, enter the user name of a Virgo Employee Portal User or Employee Portal User Plus. |
You can manage identity providers. For example, you can configure Virgo to support Single Sign On, also known as SSO.
In a SAML relationship there is an identity provider and a service provider. Virgo is the service provider. The identify provider could be Active Directory (ADFS), Azure AD, or another service. The identify provider includes a list of users and you set up a trust relationship between the identity provider and the service provider.
The table below describes the fields on the Identity Providers Details page and when you create or edit an identity provider.
| Field | Description |
|---|---|
|
Name |
The name that displays in Virgo or on the Virgo login page. |
|
Type |
Only SAML 2.0. |
|
SSO URL |
The SSO service URL from an identity provider, typically provided in an XML metadata file. |
|
Entity ID |
The entity ID from an identity provider, typically provided in an XML metadata file. |
|
IdP Certificate |
The signing certificate from a customer's identity provider, typically provided in an XML metadata file. Must be in SAML 2.0 PEM encoded format with headers generated from a tool like SAML Developer Tools. |
|
Authentication Request Binding |
The setting for the SSO URL from the XML metadata file. |
|
Authentication Context |
A hint to identify provider for the kind of authentication. Unspecified means to use whatever kind of authentication the identity provider wants to use (default). If ADFS, select Disabled. |
|
Identifier Format |
The default is emailAddress. |
|
Virgo Identifier Field |
The field in the user information in Virgo to match. For example, Username. |
|
Signature Algorithm |
The signature algorithm from the identity provider, typically provided in an XML metadata file. |
|
Employee Portal User Mapping |
Select a Virgo Employee Portal User or Employee Portal User+ to allow access to Virgo. |
|
Show on Login Page |
Select Yes to display this identity provider on the Virgo login page. |
|
Inactive |
Select Yes to disable the identity provider. |
|
Logout Redirect URL |
When a user logs out of Virgo, this page displays instead of the Virgo login screen. |
|
Virgo SSO |
This section displays Virgo's service provider information. Click the paperclip to download XML metadata files and then import into an identity provider. |
|
Employee Portal SSO |
This section displays the Virgo Employee Portal service provider information. Click the paperclip to download XML metadata files and then import into an identity provider. |
If the Partners feature is enabled, you can view partners who have access to your Virgo site. For example, the Access Support team is a partner. This feature also supports internal and external partnerships between Virgo customers.
To add a partner, contact Support.
NOTE: A partner user has the same user role and permissions on your Virgo site as they have on their site. For example, if a partner user has administrator access on their Virgo site, they will also have administrator access on your site. If they have read-only access on their Virgo site, they will only have read-only access on your site.
- Click the Admin link.
- Click the Partners tab.
- Select the partner and click View Detail.
- Specify the Expiration Date, which controls the partner's access to your site. Leave blank to allow indefinite access.
- Click Save.
TIP: You can view partner activity on the Security Log tab. The Event Type will display Partner Authentication, indicating that a partner signed into or out of your Virgo site.
If your Virgo subscription includes the Security Groups feature, users with the Administrator or User Manager role can create security groups for Virgo users. Security groups restrict users' ability to edit record series. For example, you can create a security group that ensures only users in the Switzerland Finance group can edit a Swiss financial record series.
NOTE: Currently, Security Groups apply only to the Record Series tab.
-
On the Security Group tab click New.
-
Enter a unique Name for the security group.
-
Enter a Description for the security group.
-
The optional SSO Designation field will support a future feature that will let users in the security group log into Virgo via their Single Sign-On (SSO) provider.
-
Click Save. You can now assign the security group to users.
The Integrations tab is used to manage connectors to Virgo. On the Integrations tab you can view, create, or delete integration services.
You can track user activity through the security log. The security log also contains login activity, user changes, and data exports. You can also generate a report of the grid to track changes a user has made in Virgo.
-
Click Edit Columns to customize the fields.
- All lists are exportable into an Excel or CSV file.
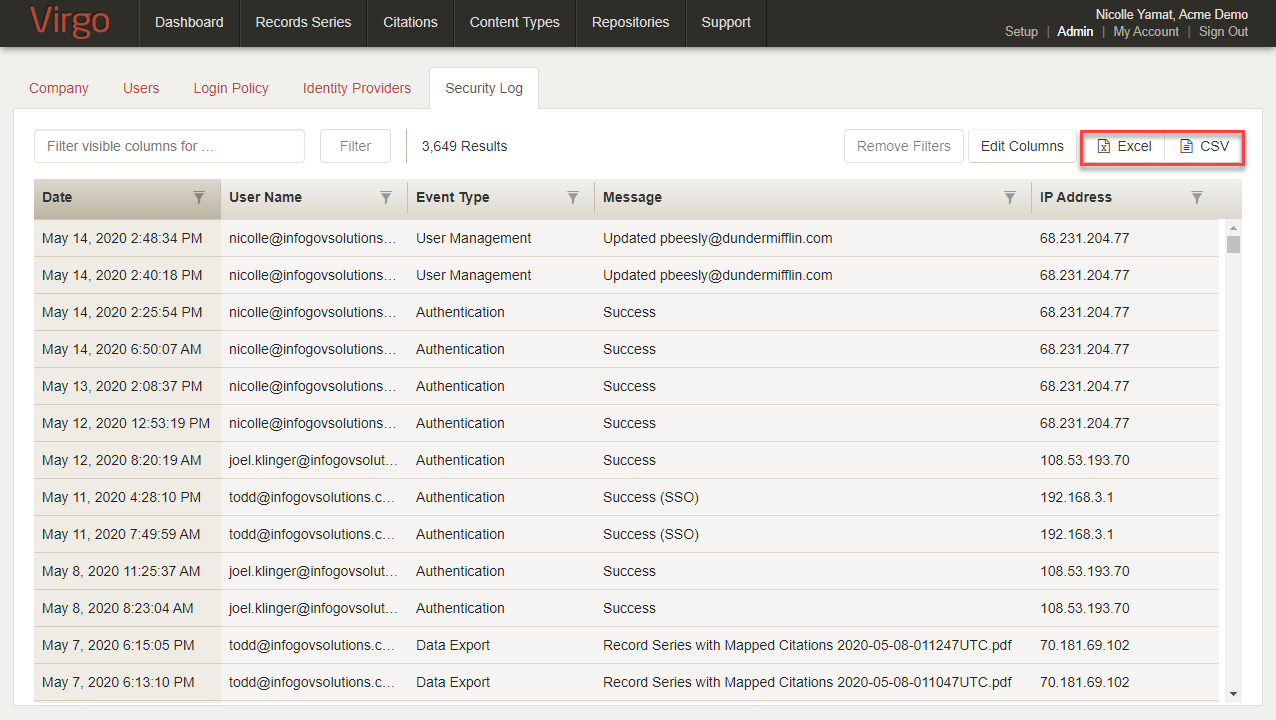 To view an example of the Security Log tab, hover your mouse over the image.